Dazzling Applications
Richer Runtime Environment
We have already provided user programs with access to IOE in the form of system calls and files, and have done some low-level encapsulation through NDL. However, for some more complex programs, it is still quite difficult to program directly using NDL. In order to better support the development and execution of these complex programs, we need to provide higher-level libraries.
Multimedia Library
In Linux, there is a batch of GUI programs developed using the SDL library. In Navy, there is a miniSDL library that can provide some APIs compatible with SDL, so that these GUI programs can be easily ported to Navy. The code for miniSDL is located in the navy-apps/libs/libminiSDL/ directory, and it consists of 6 modules:
timer.c: Clock managementevent.c: Event handlingvideo.c: Drawing interfacefile.c: File abstractionaudio.c: Audio playbackgeneral.c: General functions, including initialization, error management, etc.
We can use NDL to support the low-level implementation of miniSDL, allowing miniSDL to provide richer functionality to user programs, so that we can run more complex programs on Navy. The APIs in miniSDL have the same names as those in SDL, and you can refer to RTFM to understand the specific behavior of these APIs. Additionally, most of the APIs in miniSDL are not implemented, so it's better for you to come up with a way to remind yourself when a program uses an unimplemented API, otherwise you may find it difficult to understand the unexpected behavior of complex programs caused by this.
Be sure to understand the behavior of SDL APIs through RTFM
We will only briefly introduce the purpose of these APIs in the lecture notes, so please be sure to consult the SDL manual to understand their specific behavior.
Fixed-Point Arithmetic
Some program logic uses real numbers. Currently, real computer systems generally have an FPU, so developers also tend to choose to use floating-point numbers to represent these real numbers. However, the floating-point standard is too complex for a computer system oriented towards teaching, especially considering the case of self-designed processors: implementing a correct FPU in hardware is an extremely difficult task for everyone. Therefore, we do not intend to introduce floating-point numbers in the entire Project-N system: NEMU does not have an FPU, executing floating-point operations in AM is UB, Nanos-lite considers floating-point registers not part of the context, and Navy does not provide a runtime environment related to floating-point numbers (we defined the macro NO_FLOATING_POINT when compiling Newlib).
If we can implement the program logic in other ways, then these cool programs will have the opportunity to run on your own designed processor. In fact, floating-point numbers are not the only representation of real numbers, fixed-point numbers can also represent real numbers! Moreover, fixed-point arithmetic can be implemented through integer arithmetic, which means that we can implement real number logic through integer arithmetic instructions, without the need to introduce an FPU in hardware to run these programs. Such an arithmetic system is called fixed-point arithmetic.
Navy provides a fixedptc library specifically for fixed-point arithmetic. The fixedptc library uses a 32-bit integer to represent real numbers by default, with the specific format being "24.8" (see navy-apps/libs/libfixedptc/include/fixedptc.h), meaning that the integer part occupies 24 bits and the fractional part occupies 8 bits. It can also be considered that the decimal point of the real number is always fixed to the left of the 8th binary digit. The library defines the fixedpt type to represent fixed-point numbers, and you can see that its essence is the int32_t type.
31  30                           8          0
+----+---------------------------+----------+
|sign|          integer          | fraction |
+----+---------------------------+----------+
In this way, for a real number a, its fixedpt type representation is A = a * 2^8 (truncating the fractional part of the result). For example, the real numbers 1.2 and 5.6 are approximately represented using the FLOAT type as:
1.2 * 2^8 = 307 = 0x133
+----+---------------------------+----------+
| 0  |             1             |    33    |
+----+---------------------------+----------+


5.6 * 2^8 = 1433 = 0x599
+----+---------------------------+----------+
| 0  |             5             |    99    |
+----+---------------------------+----------+
However, the actual real numbers (true values) represented by these two fixedpt type data are:
0x133 / 2^8 = 1.19921875
0x599 / 2^8 = 5.59765625
For negative real numbers, we represent them using the opposite of the corresponding positive number. For example, the fixedpt type representation of -1.2 is:
-(1.2 * 2^8) = -0x133 = 0xfffffecd
Navy as Infrastructure
In PA2, we introduced the native architecture in AM. With the abstraction of the AM API, we can run our own programs on native first, which can effectively distinguish between hardware (NEMU) bugs and software bugs. Can we achieve a similar effect in Navy?
The answer is definitely yes, because this effect is a gift brought to us by the computer as an abstraction layer. The runtime environment provided by Navy includes libos, libc (Newlib), some special files, and various application-oriented libraries. We refer to the first three as the "operating system-related runtime environment", while the application-oriented libraries are not closely related to the operating system. In this discussion, we can even categorize them as Navy applications. Similar to using the Linux native functionality to implement the AM API in AM, we can also use the Linux native functionality to implement the aforementioned runtime environment, thereby supporting the execution of the same Navy applications and testing them individually. In this way, we have achieved the decoupling of the operating system-related runtime environment and Navy applications.
We provide a special ISA called native in Navy to achieve the aforementioned decoupling. The differences between it and other ISAs are:
- During linking, it bypasses libos and Newlib, allowing the application to directly link to Linux's glibc
- It implements the functionality of special files such as
/dev/events,/dev/fbthrough some Linux native mechanisms (seenavy-apps/libs/libos/src/native.cpp) - Applications compiled to Navy native can be run directly and can also be debugged with gdb (see
navy-apps/scripts/native.mk), while applications compiled to other ISAs can only run with the support of Nanos-lite
Although Navy's native and AM's native have the same name, their mechanisms are different: the system running on AM native requires abstraction layers such as AM, Nanos-lite, libos, and libc to support the aforementioned runtime environment. In AM, ARCH=native corresponds to ISA=am_native in Navy; while in Navy native, the aforementioned runtime environment is directly implemented by Linux native.
You can run make ISA=native run in the directory where bmp-test is located to compile bmp-test to Navy native and run it directly, and you can also debug it through make ISA=native gdb. This way, you can test all the code in Navy except libos and Newlib (e.g., NDL and miniSDL) in the Linux native environment. An exception is the dummy in Navy, since it directly triggers system calls through _syscall_(), such code cannot be run directly on Linux native because Linux does not have this system call (or the number is different).
The Magic of LD_PRELOAD
bmp-test needs to open a file with the path /share/pictures/projectn.bmp, but in Linux native, the file corresponding to this path does not exist. However, we still managed to run bmp-test successfully. Do you know how this is achieved? If you are interested, you can search for information related to LD_PRELOAD on the internet.
Wine, WSL, and Runtime Environment Compatibility
We can implement Navy's runtime environment through Linux native, allowing Navy applications to run on Linux native. Can we then implement the runtime environment of other operating systems, such as providing a Windows-compatible runtime environment on Linux, thereby supporting the execution of Windows applications on Linux?
Wine is such a project, which implements Windows-related APIs through the Linux runtime environment. Another project in the opposite direction is WSL, which implements the Linux API through the Windows runtime environment, thereby supporting the execution of Linux programs on Windows. However, WSL also modifies the Windows kernel to provide dedicated support for Linux programs. However, the complete Linux and Windows runtime environments are too complex, so some programs with a relatively complex dependency on the runtime environment are still difficult to run perfectly on Wine or WSL, to the point that WSL2 has abandoned the "runtime environment compatibility" technical route and instead adopted a virtual machine approach to run the Linux system perfectly. In contrast, Navy's runtime environment is very simple, and we can implement it with less than 300 lines of native.cpp. However, if you understand the concepts involved, you will also understand how technologies like WSL work.
Applications in Navy
With these function libraries, we can run more programs in Navy. To run Xian Jian Qi Xia Zhuan (The Legend of Sword and Fairy), we need to implement more features. Let's first run some simple programs to test your implementation.
NSlider (NJU Slider)
NSlider is the simplest displayable application in Navy. It is a slide show player that supports page turning. In the 2018 Second Loongson Cup Competition, the Nanjing University team achieved the goal of "presenting slides in their self-built full-stack computer system for the final on-site defense" by running NSlider on their self-implemented out-of-order processor.
Now you can also run NSlider on your self-built computer system, but you need to implement the SDL_UpdateRect() API first. The SDL drawing module introduces the concept of a Surface, which can be thought of as a canvas with various attributes. You can refer to RTFM to understand the meaning of the members in the Surface structure. The purpose of SDL_UpdateRect() is to synchronize the specified rectangular area of the canvas to the screen.
Run NSlider
We provide a script to convert a 4:3 aspect ratio PDF slide deck into BMP images and copy them to navy-apps/fsimg/. You need to provide a PDF file that meets the conditions, and then refer to the corresponding README file for instructions. However, you may encounter some problems during the conversion, which you need to resolve yourself.
Then, implement SDL_UpdateRect() in miniSDL. If your implementation is correct, running NSlider will display the first slide. This is likely your first encounter with SDL APIs, so you will need to RTFM and RTFSC to understand the behavior of the existing code.
Note the size of the ramdisk image
We link the contents of the ramdisk image to the data segment of Nanos-lite, and load the user program near the memory address 0x3000000 (x86) or 0x83000000 (mips32 or riscv32). This implies an assumption: the size of the ramdisk image cannot exceed 48MB. If this assumption is not met, the contents of the ramdisk may be overwritten, causing hard-to-understand errors. Therefore, you need to pay attention to the size of the ramdisk image and avoid including too many or too large files.
Run NSlider (2)
Implement SDL_WaitEvent() in miniSDL, which is used to wait for an event. You need to encapsulate the events provided by NDL into SDL events and return them to the application. You can understand the format of SDL events by reading the NSlider code. After implementing it correctly, you will be able to turn pages in NSlider. Please RTFSC for the page-turning operation.
MENU (Boot Menu)
The boot menu is another program with relatively simple behavior. It displays a menu where the user can choose which program to run. To run it, you need to implement two drawing-related APIs in miniSDL:
SDL_FillRect(): Fill the specified rectangular area of the canvas with a specified colorSDL_BlitSurface(): Copy the specified rectangular area from one canvas to a specified position on another canvas
The boot menu will also display some English fonts. The font information is stored in BDF format, and Navy provides a libbdf library to parse the BDF format, generate pixel information for the corresponding characters, and encapsulate them into an SDL Surface. After implementing SDL_BlitSurface(), we can conveniently output the pixel information of strings on the screen.
Run the Boot Menu
After correctly implementing the above APIs, you will see a boot menu that can be paged through. However, when you try to select a menu item, an error will occur. This is because running the boot menu requires support for some system calls, which we will introduce later. For now, you can use the boot menu to test miniSDL.
NTerm (NJU Terminal)
NTerm is a terminal emulator that implements basic terminal functionality, including character input and backspace, as well as command retrieval. The terminal is generally used in conjunction with a Shell. Commands obtained from the terminal will be passed to the Shell for processing, and the Shell will output information to the terminal. NTerm comes with a very simple built-in Shell (see builtin-sh.cpp), which ignores all commands by default. NTerm can also communicate with external programs, but this is beyond the scope of ICS, and we will not use this feature in the PA.
To run NTerm, you need to implement two APIs in miniSDL:
SDL_GetTicks(): It has a similar function toNDL_GetTicks(), but with an additional small requirement. Please RTFM for details.SDL_PollEvent(): UnlikeSDL_WaitEvent(), it will return immediately if there are no events currently.
Run NTerm
After correctly implementing the above APIs, you will see the NTerm cursor blinking at a rate of once per second, and you can input characters. To allow NTerm to launch other programs, you will also need to implement some system calls, which we will introduce later.
Implement the built-in echo command
Parsing commands in the built-in Shell is very similar to parsing commands when you implemented the simple debugger in PA1, and Newlib in Navy already provides standard library functions. Interested students can implement a built-in echo command.
Flappy Bird
A friend developed a Flappy Bird game based on the SDL library sdlbird, and we can easily port it to Navy. Run make init in the navy-apps/apps/bird/ directory, and it will clone the ported project from GitHub. This ported project can still run on Linux native: run make run in the navy-apps/apps/bird/repo/ directory (you may need to install some libraries, please STFW for details). This way of running will not link to any libraries in Navy, so you will still hear some sound effects, and you can even play the game by clicking the mouse.
To run Flappy Bird in Navy, you need to implement an API from the SDL_image library: IMG_Load(). This library is implemented based on the image decoding library from the stb project, and is used to encapsulate the decoded pixels into an SDL Surface structure, allowing applications to easily display images on the screen. The aforementioned API accepts the path of an image file, and then encapsulates the pixel information of the image into an SDL Surface structure and returns it. One way to implement this API is as follows:
- Open the file using file operations from libc, and obtain the file size
size - Allocate a memory block
bufof sizesize - Read the entire file into
buf - Call
STBIMG_LoadFromMemory()withbufandsizeas parameters, which will return a pointer to anSDL_Surfacestructure - Close the file and free the allocated memory
- Return the pointer to the
SDL_Surfacestructure
Run Flappy Bird
Implement IMG_Load() and run Flappy Bird in Navy. This is essentially a file operation exercise. Additionally, Flappy Bird uses a default screen height of 400 pixels, but NEMU's default screen height is 300 pixels. To run Flappy Bird in NEMU, you need to modify SCREEN_HEIGHT in navy-apps/apps/bird/repo/include/Video.h to 300.
Flappy Bird will also attempt to open the sound card to play sound effects by default. miniSDL will make audio-related APIs return 0 or NULL by default, and the program will consider the corresponding operation to have failed, but it can still run without sound effects.
Additionally, Flappy Bird is a project suitable for everyone to read: reading it does not require much background knowledge, and it is easy for everyone to become familiar with the game rules, and then understand how the game effects are implemented in code.
Application of "Computer is an Abstract Layer": Porting and Testing
When porting games, we run the game in four environments in order:
- Pure Linux native: Unrelated to any components of Project-N, used to ensure that the game itself can run correctly. After changing library versions or modifying game code, we will first test on Linux native.
- Native in Navy: Replace Linux native libraries with Navy libraries, test if the game can run correctly with the support of Navy libraries.
- Native in AM: Replace Linux system calls and glibc with Nanos-lite, libos and Newlib, test if the game can run correctly with the support of Nanos-lite and its runtime environment.
- NEMU: Replace real hardware with NEMU, test if the game can run correctly with the support of NEMU.
Through this method, we can quickly locate the abstract layer where the bug is located. We can do this because of the conclusion "computer is an abstract layer": We can replace the parts below a certain abstract layer with a reliable implementation, first independently test an unreliable implementation of an abstract layer, and then gradually replace and test the unreliable implementations of other abstract layers. However, this requires that the code you write is portable, otherwise it will not support the replacement of abstract layers.
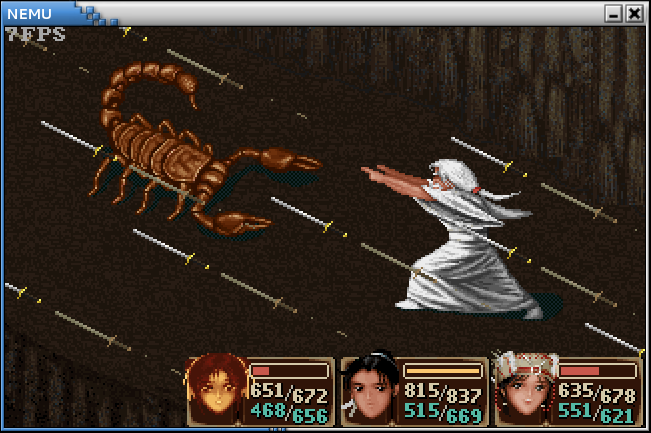
PAL (Chinese Paladin)
The original Chinese Paladin was developed for the Windows platform, so it cannot run on GNU/Linux (do you know why?) or in Navy-apps. Friends developed a cross-platform version of Chinese Paladin based on the SDL library, called SDLPAL. We have ported SDLPAL to Navy, running make init in the navy-apps/apps/pal/ directory will clone the ported project from GitHub. Like Flappy Bird, this ported project can still run on Linux native: Unzip the Chinese Paladin data files (we published the link in the course group announcement) and put them in the repo/data/ directory, execute make run in the repo/ directory, you can maximize the window to play the game. However, we changed the audio sample rate SampleRate in the configuration file sdlpal.cfg to 11025, this is to run more smoothly in Navy, if you have higher audio quality requirements, you can temporarily change it back to 44100 when experiencing it on Linux native. For more information, please refer to the README.
I am not a student of Nanjing University, how can I get the Chinese Paladin data files?
Since the data files are copyrighted by the game company, we cannot make them public. However, as a classic game with a 25-year history, you should still be able to find it through STFW.
In addition, you need to create the configuration file sdlpal.cfg and add the following content:
OPLSampleRate=11025
SampleRate=11025
WindowHeight=200
WindowWidth=320
For more information, please read repo/docs/README.md and repo/docs/sdlpal.cfg.example.
To run Chinese Paladin in Navy, you also need to enhance the drawing-related APIs in miniSDL. Specifically, as a game from the 1990s, each pixel is represented by 8 bits instead of the currently widely used 32-bit 00RRGGBB. And these 8 bits are not the actual color, but an index into an array called a "palette", where the 32-bit colors are stored. In code, it would be expressed as:
// The pixel array now directly stores 32-bit color information
uint32_t color_xy = pixels[x][y];

// The pixel array in Chinese Paladin stores 8-bit palette indices,
// use this index to index into the palette to get the 32-bit color information
uint32_t pal_color_xy = palette[pixels[x][y]];
The code in Chinese Paladin will create some Surface structures in 8-bit pixel format, and process these structures through corresponding APIs. Therefore, you also need to add support for these 8-bit pixel format Surface structures in the corresponding APIs of miniSDL.
Run Chinese Paladin
Add support for 8-bit pixel format to the drawing APIs in miniSDL. After implementing correctly, you will be able to see the game screen. For operation, you also need to implement other APIs, which APIs to implement is up to you to find out. After implementing correctly, you can run Chinese Paladin in your own NEMU implementation! For game operation, please read here.
You can perform various operations in the game to test your implementation, the data files we provide contain some game saves, the scenes in the 5 saves are as follows, which can be used for different tests:
- Mechanism maze without enemies
- Plot without animation
- Plot with animation
- Maze already entered enemy's sight
- Maze not yet entered enemy's sight
How does the framework of Chinese Paladin work?
We discussed the basic framework of a game in PA2. Try reading the code of Chinese Paladin, and find out which functions implement the basic framework. After finding them, it may help you debug Chinese Paladin to some extent. Although the code of Chinese Paladin is quite a lot, you don't need to read a large amount of code to answer this question.
Chinese Paladin's script engine
In navy-apps/apps/pal/repo/src/game/script.c, there is a PAL_InterpretInstruction() function, try to roughly understand the purpose and behavior of this function. Then boldly guess how the developers of Chinese Paladin developed this game? Do you have a new understanding of "game engine"?
No longer mysterious cheats
There are some cheats circulating online about Chinese Paladin, some of which are as follows:
- Many people go to Auntie Yun's place and take money three times, but actually taking it once will make the money box full! After taking the money once, go buy a sword and spend the money until you have only about a thousand left, then go to the Taoist priest, but don't go upstairs, go to the shopkeeper and buy wine, buy it a few more times and you'll find that you have endless money.
- Keep using Qian Kun Yi Zhi (you must have more than 5,000 coins) until your assets are less than 5,000 coins, the money will increase to the limit, so you will have endless money.
- When Li Xiaoyao reaches level 99, use 5-10 Golden Silkworm Kings, the experience points will come out again, and the experience needed for leveling up will return to the initial 5-10 level experience value, then go fight enemies or use Golden Silkworm Kings to level up, you can learn Ling'er's spells (starting from Five Elements Salute); After reaching level 199, use 5-10 Golden Silkworm Kings again, the experience points will come out again, and the experience needed for leveling up is also very low, you can learn Yue Ru's spells (starting from One Yang Finger); After reaching level 299, use 10-30 Golden Silkworm Kings, after the experience points come out, continue leveling up, you can learn Ah Nu's spells (starting from Myriad Ants Gnawing the Elephant).
Assuming that these cheats were not intended by the game developers, please try to explain why these cheats can be effective.
am-kernels
In PA2, you have already run some applications on AM, and we can easily run them on Navy as well. In fact, as long as an environment can support the implementation of the AM API, AM can run on that environment. In Navy, there is a libam library, which is used to implement the AM API. The navy-apps/apps/am-kernels/Makefile will add libam to the link list, so that the AM API called in the AM application will be linked to libam, and these APIs are implemented through the Navy runtime environment, so we can run various AM applications on Navy.
Implement AM on Navy
Implement TRM and IOE in libam, and then run some AM application programs on Navy. The above Makefile can compile coremark, dhrystone and the typing game to Navy, but you need to check if the AM_KERNELS_PATH variable in it is correct first. You can specify the compilation target through ALL like running cpu-tests before, for example make ISA=native ALL=coremark run or make ISA=x86 ALL=typing-game install.
Run microbench on Navy
Try compiling microbench to Navy and running it, you should find a runtime error, please try to analyze the reason.
FCEUX
After implementing libam, FCEUX can also run on Navy.
Run FCEUX
To compile successfully, you may need to modify the FCEUX_PATH variable in the Makefile to point to the correct path. Additionally, we have disabled sound effects when compiling FCEUX through Navy, so you don't need to implement sound card-related abstractions in libam.
How to run Nanos-lite on Navy?
Since we can run the AM-based FCEUX on Navy, then for the sake of showing off, it is not impossible to run Nanos-lite on Navy either. Think about it, if we want to implement CTE on Navy, what else do we need?
oslab0
The brilliance of AM is not only that it can conveniently support architectures, but also that adding new applications is a breeze. Your seniors wrote some small games based on AM in their OS course, and since their APIs have not changed, we can easily port these small games to PA. Of course, you can do the same in the OS course next semester.
We have collected some games in
https://github.com/NJU-ProjectN/oslab0-collection
You can get the game code by running make init in the navy-apps/apps/oslab0/ directory. You can compile them to AM and run them, please refer to the relevant README for details. You can also compile them to Navy, for example, by running make ISA=native ALL=161220016 in the navy-apps/apps/oslab0/ directory.
Games born in the "future"
Try running the games written by your seniors on Navy, you can refer to the corresponding README for game introduction and operation.
RTFSC???
The clever you might think: Wow, won't I have excellent code to refer to for next semester's oslab0? However, we have done some special processing on the released code. In the midst of disappointment, why not think about how you would implement this special processing if you had to? Does this have any similarities with expression evaluation in PA1?
NPlayer (NJU Player)
This part is optional
Prerequisite: Implement the sound card in PA2.
NPlayer is a music player (and may support video in the future), which can be considered a trimmed version of MPlayer on Linux, supporting volume adjustment and audio visualization. You have already implemented the sound card device in PA2 and provided the corresponding IOE abstraction in AM. To allow programs on Navy to use the sound card, we need to provide some corresponding functions in the Navy runtime environment, and this process is very similar to the implementation of graphics-related functions.
The audio-related runtime environment includes the following:
- Device files. Nanos-lite and Navy agree to provide the following device files:
/dev/sb: This device file needs to support write operations, allowing applications to write decoded audio data into the sound card's stream buffer and play it, but does not supportlseek, because the audio data stream no longer exists after playback, so there is no concept of "position". Additionally, writing to this device is blocking, if there is not enough free space in the sound card's stream buffer, the write operation will wait until the audio data is completely written into the stream buffer before returning./dev/sbctl: This device file is used for controlling and querying the status of the sound card. When writing, it is used to initialize the sound card device, the application needs to write 3intintegers of 12 bytes at once, the 3 integers will be interpreted asfreq,channels,samplesin order, to initialize the sound card device; when reading, it is used to query the status of the sound card device, the application can read out anintinteger, representing the current free bytes in the sound card device's stream buffer. This device does not supportlseek.
- NDL API. NDL encapsulates the above audio-related device files and provides the following APIs:
// Open audio functionality, initialize the sound card device
void NDL_OpenAudio(int freq, int channels, int samples);

// Close audio functionality
void NDL_CloseAudio();

// Play the audio data of length `len` bytes in the buffer `buf`, return the number of bytes of audio data successfully played
int NDL_PlayAudio(void *buf, int len);

// Return the current free bytes in the sound card device's stream buffer
int NDL_QueryAudio();
- miniSDL API. miniSDL further encapsulates the above NDL APIs and provides the following functionality:
// Open audio functionality, and initialize the sound card device according to the members in `*desired`
// After successful initialization, audio playback is in a paused state
int SDL_OpenAudio(SDL_AudioSpec *desired, SDL_AudioSpec *obtained);

// Close audio functionality
void SDL_CloseAudio();

// Pause/resume audio playback
void SDL_PauseAudio(int pause_on)
These miniSDL APIs are the same as the APIs you used to implement the sound card device in NEMU in PA2, and their specific behavior can be found by RTFM.
One problem that needs to be solved is how to implement the callback function for filling audio data. This callback function is provided by the application that calls SDL_OpenAudio(), miniSDL needs to call it periodically to obtain new audio data to write into the stream buffer. To implement the above functionality of the callback function, we need to solve the following problems:
How often should the callback function be called? This can be calculated based on the parameters provided by the application in the
SDL_AudioSpecstructure. Specifically,freqis the sampling rate per second,samplesis the number of samples that the callback function requests the application to fill at once, so the interval for miniSDL to call the callback function can be calculated.How to make miniSDL call the callback function periodically? In Linux, there is a notification mechanism called "signal", based on which a timer (similar to an alarm clock) function can be implemented, and the application can be notified after a certain period of time. However, implementing a signal mechanism in Nanos-lite and Navy is a very complex task, so Nanos-lite does not provide a notification mechanism similar to signals. To achieve the effect of "periodically calling the callback function" in the absence of a notification mechanism, miniSDL can only actively query "whether it is time to call the callback function again". Therefore, we can implement an auxiliary function called
CallbackHelper(), whose behavior is as follows:- Query the current time
- If the current time is greater than the time since the last call to the callback function plus the call interval, call the callback function, otherwise return directly
- If the callback function is called, update the "last call time"
In this way, as long as we call
CallbackHelper()as frequently as possible, we can call the callback function in a timely manner. To achieve this, we can insertCallbackHelper()into some APIs in miniSDL that the application will frequently call. Although this approach is not perfect, it is still a feasible method.
After miniSDL calls the callback function to obtain new audio data, it can play these audio data through the NDL APIs. However, according to the agreement, writing to /dev/sb is blocking, so we should avoid writing too much audio data into the stream buffer, causing waiting, as it would be better to use the waiting time for program execution. Therefore, we can first query the current free space in the stream buffer, and ensure that the length of the audio data obtained from the callback function each time does not exceed the free space, so that waiting can be avoided.
After implementing these functions, we can run NPlayer. In addition to calling miniSDL, NPlayer also calls a library called vorbis, which is implemented based on the OGG audio decoder library in the stb project, and can decode an OGG audio file into PCM audio data.
Run NPlayer
After implementing the above audio-related functions, try running NPlayer on Navy. NPlayer will play a complete "Twinkle Twinkle Little Star" by default. You can also adjust the volume during playback, and you can RTFSC for specific operations.
We also recommend that you read the code of NPlayer, as it implements a very simple audio player with less than 150 lines of code. For the API functions of the vorbis library, you can read the documentation in navy-apps/libs/libvorbis/include/vorbis.h.
Play your favorite music
Since the Navy library does not provide decoders for other audio formats, NPlayer can currently only play OGG format music. However, you can use ffmpeg to convert your favorite music to OGG format, put it in the navy-apps/fsimg/ directory, and then NPlayer can play it.
PAL (with music and sound effects)
The music in Chinese Paladin uses the company's custom RIX format, and SDLPAL has already integrated the RIX audio decoder. However, to successfully play music in Chinese Paladin on Navy, you still need to solve the following two problems.
The first problem is related to the initialization of the RIX decoder. The decoder uses a library called Adplug (see navy-apps/apps/pal/repo/src/sound/adplug/), which is written in C++, and defines some global objects. For global objects, the calling of the constructor requires the support of the runtime environment, but the default runtime environment of Navy does not provide such support.
To help you further understand this problem, Navy has prepared a test cpp-test. This test program does something very simple: it defines a class in the code, performs output in the constructor and destructor, and defines a global object through this class. When running it directly on Navy's native, you can see that the program runs in the order of constructor -> main() -> destructor, this is because Navy's native links to Linux's glibc, and the runtime environment it provides already supports the construction and destruction of global objects. However, if you run it through Nanos-lite, you will find that the program does not call the constructor and destructor, which will leave the members of the global object in an uninitialized state, and accessing this global object in the program will cause unexpected results.
In fact, the C++ standard specifies that "whether the constructor of a global object is called before the main() function executes" is implementation-defined behavior, g++ wraps the initialization of the global object's constructor into an auxiliary function of type void (*)(void), and then writes the address of this auxiliary function into a section called .init_array. This special section can be regarded as an array of function pointers of type void (*)(void), specifically used to collect those functions that need to be executed before the main() function. In this way, the CRT can then traverse this array and call these functions one by one.
Make the runtime environment support the initialization of C++ global objects
Newlib already contains a function __libc_init_array() to traverse the above array (defined in navy-apps/libs/libc/src/misc/init.c), but the runtime environment of the framework code does not call it, you only need to call this function before calling main(). Run cpp-test through Nanos-lite, if your implementation is correct, you will see that the constructor is executed before the main() function.
Understand the process of calling the constructor of global objects
Try reading the code of the above __libc_init_array() function, and combine it with the results of objdump and readelf, understand how the compiler, linker, and runtime environment work together to implement the functionality of "calling the constructor of global objects". To see the contents of the .init_array section, you need to add the -D parameter to objdump.
To successfully play music in Chinese Paladin on Navy, the second problem you need to solve is the re-entrancy of the callback function. In order to call the callback function as timely as possible, we call CallbackHelper() in some commonly used APIs of miniSDL. However, if the callback function calls these APIs again, it will cause an infinite recursion. One way to solve this problem is to use a flag to indicate whether the current function call is a re-entry, and if so, return directly.
Run Chinese Paladin with music and sound effects
Solve the above re-entry problem, and you can play music in Chinese Paladin.
Flappy Bird (with sound effects)
Playing sound effects in Flappy Bird requires implementing another 3 audio-related APIs in miniSDL:
// Open the WAV file pointed to by `file` and parse it, fill its related format into spec,
// and allocate a segment of memory consistent with the total length of the audio data, read the audio data from the WAV file into the allocated memory,
// return the starting address of the memory through audio_buf, and return the number of bytes of audio data through audio_len
SDL_AudioSpec *SDL_LoadWAV(const char *file, SDL_AudioSpec *spec, uint8_t **audio_buf, uint32_t *audio_len);

// Free the memory allocated through SDL_LoadWAV()
void SDL_FreeWAV(uint8_t *audio_buf);

// Mix the `len` bytes of audio data in the buffer `src` into another buffer `dst` with the volume `volume`
void SDL_MixAudio(uint8_t *dst, uint8_t *src, uint32_t len, int volume);
To implement SDL_LoadWAV(), you need to understand the WAV file format. The relationship between PCM and WAV is very similar to that between BIN and ELF: in PA2, we directly played audio data in PCM format, while a WAV file can be regarded as a combination of PCM audio data and some organizational information, and the process of parsing WAV is to read out this information from the WAV file header. This process is very similar to the ELF loader you implemented previously. Additionally, WAV files also support audio data compression, but the WAV files used in PA are all uncompressed PCM format, so you do not need to identify and handle compressed cases.
Finally, let's look at SDL_MixAudio(), which is used to mix two segments of audio data to achieve playing them simultaneously. Before mixing, the volume of one of the audio data segments can also be adjusted. We know that sound is the superposition of several sine waves, and PCM encoding is obtained by sampling and quantizing the superimposed curve. Since the volume is proportional to the amplitude of the curve, adjusting the volume is to adjust the value of each sample point proportionally. We define the maximum volume SDL_MIX_MAXVOLUME in navy-apps/libs/libminiSDL/include/sdl-audio.h, if the volume parameter is 1/4 of SDL_MIX_MAXVOLUME, it means adjusting the volume of the audio to 1/4 of the original. To mix two audio segments, we simply superimpose their curves. However, clipping processing is still required after superposition, for the 16-bit signed format, the maximum value after superposition is 32767, and the minimum value is -32768, this is to prevent audio distortion caused by data overflow after superposition (for example, for samples located above the x-axis on the curve, they may overflow and become located below the x-axis). After understanding these contents, it is easy to implement SDL_MixAudio().
Run Flappy Bird with sound effects
Implement the above APIs, and run Flappy Bird with sound effects on Navy
Infrastructure (3)
If your Chinese Paladin cannot run correctly, with the help of different levels of native, you should be able to quickly locate the level where the bug is. If it is a hardware bug, you may fall into despair: DiffTest is too slow, especially the QEMU-based DiffTest! Is there any way to speed up DiffTest?
Freely Switching DiffTest Mode
Currently, DiffTest is always performed from the beginning, but if this bug is triggered long after, then there is no need to perform DiffTest from the beginning every time. If we suspect that the bug is triggered in a certain function, then we would prefer the DUT to run in normal mode to that function first, and then enable DiffTest mode before entering that function. This way, we can save a lot of unnecessary comparison overhead in the early stage.
To implement this feature, the key is to enter DiffTest mode at a certain moment during the DUT's execution. And an important prerequisite for entering DiffTest mode is to keep the states of DUT and REF consistent, otherwise the result of the comparison will be meaningless. We have mentioned the concept of state again, which you should be very familiar with: The state of a computer is the state of the sequential logic components in the computer. In this way, as long as we set the registers and memory of REF to be the same as DUT before entering DiffTest mode, they can start the comparison from the same state.
To control whether the DUT enables DiffTest mode, we also need to add the following two commands in the simple debugger:
- The
detachcommand is used to exit DiffTest mode, after which all instructions executed by the DUT will no longer be compared with REF. The implementation is very simple, just letdifftest_step(),difftest_skip_dut()anddifftest_skip_ref()return directly. - The
attachcommand is used to enter DiffTest mode, after which all instructions executed by the DUT will be compared with REF one by one. To do this, you also need to synchronize the contents of the physical memory in the DUT to the corresponding memory range in REF, and also synchronize the register state of the DUT to REF. Specifically, if you choose x86, you need to bypass the memory area around0x7c00in REF, because REF will have GDT-related code around0x7c00, overwriting this code will cause REF to be unable to run in protected mode, resulting in the inability to perform DiffTest afterwards. In fact, it is enough to synchronize the memory[0x100000, PMEM_SIZE), because programs running in NEMU will not use the memory space[0, 0x100000).
After that, you can enable DiffTest when the client program runs to a certain target location in the following way:
- Remove the
-bparameter when running NEMU, so that we can enter commands before the client program starts running - Enter the
detachcommand to exit DiffTest mode - Use single-step execution, watchpoints, breakpoints, etc., to let the client program run to the target location in normal mode
- Enter the
attachcommand to enter DiffTest mode, note that setting the memory of REF will take tens of seconds - You can then continue running the client program in DiffTest mode
However, the above method still has some loopholes. Specifically, we also need to handle some special registers, because they are also part of the machine state. Taking x86 as an example, we also need to handle the EFLAGS and IDTR registers, otherwise, inconsistent EFLAGS will cause the subsequent jcc or setcc instructions to produce unexpected results in REF, and inconsistent IDTR will cause system calls executed in REF to crash due to the inability to find the correct target location. One challenge here is that some registers in REF are difficult to set directly, for example, the GDB protocol for communicating with QEMU does not define how to access IDTR. However, the APIs provided by DiffTest can already solve these problems: We can use difftest_memcpy_from_dut() to copy a sequence of instructions to the free memory in REF, then use difftest_setregs() to make REF's pc point to this sequence of instructions, and then use difftest_exec() to make REF execute this sequence of instructions. In this way, we can make REF execute any program, for example, we can make REF execute the lidt instruction, so that IDTR can be set indirectly. To set the EFLAGS register, you can execute the popf instruction.
Implement freely switchable DiffTest
Based on the above content, add the detach and attach commands in the simple debugger, to implement free switching between normal mode and DiffTest mode.
The above text basically explains the implementation approach clearly. If you encounter specific problems, try to analyze and solve them yourself.
Snapshots
Further, NEMU itself does not need to start from the beginning every time. We can save the state of NEMU to a file, just like the save system in Chinese Paladin, and then we can directly restore to that state from the file and continue execution. In the field of virtualization, this mechanism has a special name called snapshots. If you use a virtual machine to do PA, you should be familiar with this term. Implementing snapshots in NEMU is a very simple task, we just need to add the following commands in the simple debugger:
save [path], save the current state of NEMU to the file indicated bypathload [path], restore the state of NEMU from the file indicated bypath
Implement snapshots in NEMU
We have emphasized the state of NEMU countless times, go ahead and implement it. Additionally, since we may run NEMU in different directories, it is recommended that you use absolute paths to indicate the snapshot file when using snapshots.
Showcase Your Batch Processing System
At the end of PA3, you will add some simple features to Nanos-lite to showcase your batch processing system.
You have already run the boot menu and NTerm on Navy, but they do not support running other programs. This is because "running other programs" requires a new system call to support, which is SYS_execve, whose purpose is to terminate the current program and start a specified program. This system call is somewhat special, if it is executed successfully, it will not return to the current program, for more information, you can refer to man execve. To implement this system call, you only need to call naive_uload() in the corresponding system call handler function. For now, we only need to care about filename, and the argv and envp parameters can be ignored temporarily.
Boot menu that can run other programs
You need to implement the SYS_execve system call, and then run other programs through the boot menu. You have already implemented many system calls, so we won't go into details about what you need to pay attention to.
Showcase your batch processing system
With the boot menu program, you can easily implement a batch processing system with some semblance. You only need to modify the implementation of SYS_exit, so that it calls SYS_execve to run /bin/menu again, instead of directly calling halt() to terminate the entire system. This way, when a user program ends, the operating system will automatically run the boot menu program again, allowing the user to select a new program to run.
As the number of applications increases, using the boot menu to run programs becomes less convenient: you need to keep adding new applications to the boot menu. A more convenient way is to run these programs through NTerm, you just need to enter the program path, such as /bin/pal.
Showcase your batch processing system (2)
Implement command parsing in the built-in Shell of NTerm, and call execve() with the entered command as the argument. Then make NTerm the first program to start in Nanos-lite, and modify the implementation of SYS_exit to run /bin/nterm again. For now, we do not support passing arguments, you can ignore command arguments first.
Entering the full path of a command is a relatively tedious task. Recall that when we use ls, we don't need to enter /bin/ls. This is because the system defines the PATH environment variable, you can read about the related behavior through man execvp. We can also make the built-in Shell in NTerm support this feature, you only need to set PATH=/bin through the setenv() function, and then call execvp() to execute the new program. When calling setenv(), you need to set the overwrite parameter to 0, so that the same effect can be achieved on Navy native.
Add environment variable support for the built-in Shell in NTerm
This is a very simple task, you only need to RTFM to understand the behavior of setenv() and execvp(), and make a small modification to the code of the built-in Shell, and you will get a Shell with a very similar user experience to what you are used to.
The ultimate question
Since ancient times, there has been an ultimate question in computer systems courses:
When you enter
./helloin the terminal to run the Hello World program, what exactly does the computer do?
You have implemented a batch processing system, and successfully run other programs through NTerm. Although our batch processing system has been greatly simplified, it still retains the essence of the history of computer development. After implementing the batch processing system, do you have any new insights into the above ultimate question?
Add boot music
You can prepare a few seconds of music (e.g., a famous XP boot music), and play it in NTerm, so that this music will automatically play when the system starts up and enters NTerm. You can refer to the NPlayer code for the implementation of playing music.
Up to this point, we have basically implemented a "modern" batch processing system: The boot menu MENU we just ran is similar to the "100-in-1" game selection menu on the NES; and the behavior of NTerm is also very similar to the terminals and shells we use daily. Importantly, all of this was built by your own hands: NEMU, AM, Nanos-lite, the Navy runtime environment, and finally the applications. The macroscopic perspective of "computer as an abstract layer" has been fully presented before your eyes. You finally understand how complex programs like Chinese Paladin go through the layers of abstraction in the computer system, ultimately being decomposed into the most basic hardware operations, and running on the hardware in a state machine manner. When you understand this truth and feel amazed by it, the ultimate goal of PA to help everyone understand "how programs run on a computer" has been largely achieved.
Compulsory question - Understanding computer systems
Understand the past and present of the context structure (see PA3.1 stage)
Understand the journey through time and space (see PA3.1 stage)
What is the hello program, where does it come from, and where is it going (see PA3.2 stage)
How does Chinese Paladin actually run When running Chinese Paladin, a startup animation will play, with a crane flying through the mountains. This animation is played through the
PAL_SplashScreen()function innavy-apps/apps/pal/repo/src/main.c. Reading this function, you can find that the pixel information of the crane is stored in the data filemgo.mkf. Please answer the following question: How do library functions, libos, Nanos-lite, AM, and NEMU work together to help the Chinese Paladin code read the crane's pixel information from themgo.mkffile and update it to the screen? In a classic PA way of asking: What exactly did this process go through? (Hint: Reasonable use of various trace tools can help you better understand the behavior of Chinese Paladin)
Friendly reminder
PA3 ends here. Please write a good lab report (don't forget to answer the compulsory questions in the lab report), then place the lab report file named student_id.pdf in the project directory, and execute make submit to submit the project to the designated website.